Printing from a Docker Container!? Why would someone want to do that?
Well it turns our that as part of a “Document Production” system we had, it was possible to configure automatic print jobs from the mid-tier of our application.
We had not long moved our development and integration environments over to Docker and, utilising Jenkins multi-branch pipelines, we had the ability to spin up identical Docker environments for each branch of the application that we had in Git.
The next step was to provision a QA environment from the master branch using the same system. To prove that the environment would be adequate for QA testing, we had to prove that we could accommodate a few of the more “interesting” scenarios in our QA regression test suite. Of course one of these scenarios was automatically printing documents from the mid-tier.
CUPS
So how did we currently print from the mid-tier? Our previous testing environments had relied on CUPS (Common UNIX Printing System) configuration. By installing CUPS and adding the configuration of a printer to it, we could send jobs to that printer just by specifying the name of that printer in the configuration of our Document Production workflow.
![]()
So what would this look like in our new environment? Well the first step was to make sure that we had CUPS installed in our containers. It was added to the CentOS Java base image we add our application to with a simple RUN yum -y install cups cups-pdf step added to the Dockerfile. Our Docker image contains a startup.sh script that is run on container start-up. This is defined in the CMD line of our Dockerfile. To this script /usr/sbin/cupsd -f was added to start the CUPS service. The image was then rebuilt and an attempt to access the CUPS admin page was made. In the compose file used when deploying the application, port 631 was exposed to try and allow access to the CUPS control panel web interface.
CUPS Config
Alas this wasn’t quite enough to get us up and running. Whilst it was possible to access the control panel, any attempt to configure printers within it didn’t work. There were a number of additional steps to get a fully working control panel interface:
- Create a copy of the /etc/cups/cupsd.conf file on the container
- Edit it with the following:
- Add
DefaultEncryption Neverto the top of the file to stop CUPS from trying to forward to HTTPS and SSL when neither of these have been configured on the container. - Change
Listen localhost:631to0.0.0.0:631to allow all incoming connections. - Update the following to allow access to the whole of the web interface:
    # Restrict access to the server...
    <Location />
    Order allow,deny
    Allow all
    </Location>

    # Restrict access to the admin pages...
    <Location /admin>
    Order allow,deny
    Allow All
    </Location>
Now to get that on to the container…
- Add the following to the Dockerfile to copy your new version of cupsd.conf to the container.
COPY cupsd.conf /etc/cups/ - Create an admin user for the control panel with the following command, using python to create an appropriately hashed password. So that it is run on the start up of the container it was added to a startup.sh script before the starting of the CUPS service.
getent group admin &>/dev/null || groupadd lpadmin
id -u admin &>/dev/null || useradd admin --system -G root,lpadmin --no-create-home --pasword $(python -c 'import crypt; print(crypt.crypt("admin", crypt.mksalt(crypt.METHOD_SHA512)))')
Now you should be able to access a fully functioning CUPS control panel in the container from the browser of your host (at localhost:631).
Printer Configuration
So now we have CUPS running in the container and can configure printers and jobs within the control panel. Now we need to work out a way to deploy the container with pre-configured printer settings so that the application can print straight out of the box without a tester needing to do any extra configuration.
Within the /etc/cups/ directory there is a printers.conf file that is used to store printer configuration. Surely we could just go and steal the copy of this in our old environment and copy it in to our container using COPY printers.conf /etc/cups/ in the Dockerfile?
Here is an example printers.conf, replace <printer_ip_address> with your printer’s network IP address…
# Printer configuration file for CUPS v1.6.3
# Written by cupsd on 2017-02-22 15:31
# DO NOT EDIT THIS FILE WHEN CUPSD IS RUNNING
<Printer 2F_BWHP>
UUID urn:uuid:66153140-a17c-3473-5675-13c67fdeb727
Info Black & White HP LaserJet
Location Office 2nd Floor
MakeModel HP Color LaserJet Series PCL 6 CUPS
DeviceURI http://<printer_ip_address>
State Idle
StateTime 1487777493
Type 8400972
Accepting Yes
Shared Yes
JobSheets none none
QuotaPeriod 0
PageLimit 0
KLimit 0
OpPolicy default
ErrorPolicy stop-printer
</Printer>
So with this copied across to the printer, we then set off a print job from the mid-tier to that printer name (2F_BWHP) and…
Whilst we have successfully printed from our container, the printer is just printing out many pages of garbage.
HP Drivers
The printer we were trying to use here was an HP printer, and we clearly needed some kind of driver set up to get it printing properly. There are many drivers and tools for using CUPS with HP printers and after a lot of frustrating trial and error, the following method was used to configure the printer in our container.
- Add the HP Linux Image and Printing software to our container by adding it to our
yum installcommand in the Dockerfile. This now looks likeyum -y install hplip cups cups-pdf - Now start the container up and open a terminal on it.
- Use the
hp-makeuricommand to create a URI to the printer. Following the printers.conf above, this would look likehp-makeuri <printer_ip_address>using the address of the printer on the network. - Take the output of the command and replace the DeviceURI in printers.conf (don’t forget to update this file outside of the container as well) with the new generated URI, e.g.
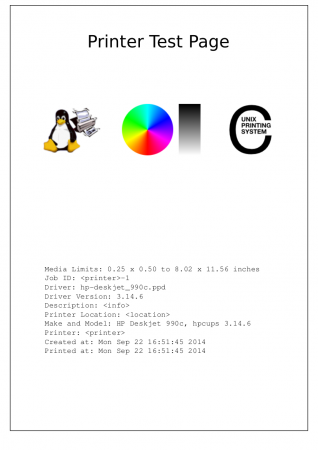
DeviceURI hp:/net/HP_LaserJet_P3010_Series?ip=<printer_ip_address>. - Go to the CUPS control panel and attempt to print a test page…
You should now have something like the following being printed:
Summary
After a rebuild of our container image we now have CUPS installed and configured in the container and the appropriate printer configuration and drivers installed. We can now successfully print from a containerised version of our application mid-tier!
Next Steps
Some thoughts for the future…
- When deploying the container to production how can we open up the printer configuration to allow customers to set it up for their own printers?
- Should we expose the CUPS config via a Docker volume to allow people to configure CUPS via the control panel running on the container but then persist the configuration?